How to Create a Recovery Drive and System Repair Disc in Windows 10
You never know when your system might go down unpredictably. You find yourself sitting in front of a black screen wondering what the heck just happened? And after you've tried all possible ways to reboot your machine, you remember that the only way to your rescue is the recovery drive you've created that you read about in a Blogpost like this or perhaps watched a video about earlier.
That's right folks, Let's find out how to create a system Recover drive and a Repair Disc (if possible in your computer) in windows 10. Now, before we start let me just make this clear that system recovery does not mean recovering all your personal files and data. It is for reviving your system's OS after a serious crash. Hence, it is advised that backing your personal data at regular intervals is a good practice.

Now, When a major issue occurs, Windows 10 has several recovery methods to assist you in troubleshooting your system. If you have a recovery drive or a system repair disc, you may use it to revive your computer after it has suffered a system failure.
Both, System Repair Discs and Recovery Drives provide excellent recovery solutions, as well as restoration tools, for troubleshooting system issues. However, there are some significant distinctions between these two methods. Let's have a look at the differences first.
How is a System Recovery Drive different from a Repair Disc?
The System Recovery Drive is the method where we make use of a USB Flash Drive (pen drive). This drive then becomes the bootable drive that we use to reboot our PC. It includes all of the troubleshooting tools found on the system repair disc, as well as a few more. One can use the drive for backing personal data but the idea is not practical because flash drives usually have limited storage space.
 |
| Source: digitaltrends.com |
Now, the Repair Disc refers to an old-school technique. Here, we use a DVD/CD on which we burn a Windows repair utility. It's a bootable CD that includes tools for troubleshooting Windows starting issues and restoring a system image backup. It's not possible to use this method if your system doesn't have a Disc Drive which is the case with most modern laptops. In case, you do have one, you're good to go with this one too.
Keep in mind that you can only use the USB recovery disc to troubleshoot the computer on which it was created. A system repair disc, on the other hand, will operate on any computer running the same version of Windows 10.
How to Create a System Recovery Drive
Believe me, the whole process is simpler than it seems. Follow along with the underlying steps and you shall be able to create a recovery drive successfully. But before that ensure that you use an empty Flash drive for the process because it will erase any data stored on your drive.
The Steps:
- Connect a USB flash drive to your PC that you wish to use as a recovery drive. A USB device with at least 16 GB of capacity is recommended by Microsoft. However, I'd recommend one with a bigger storage capacity just to stay in the safe zone.
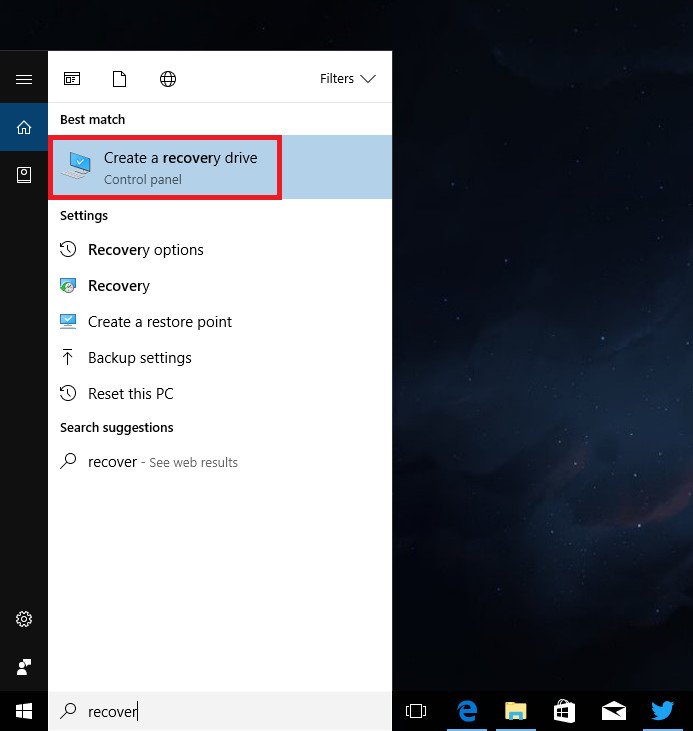
- In the Start menu search box, type "Recovery drive" and choose Recovery Drive (App) from the best match section.
- Check the option to back up system files to the recovery disc when the Recovery Drive dialogue appears. Although copying the system files is optional and may cause the recovery drive procedure to take longer, I recommend that you leave it checked.
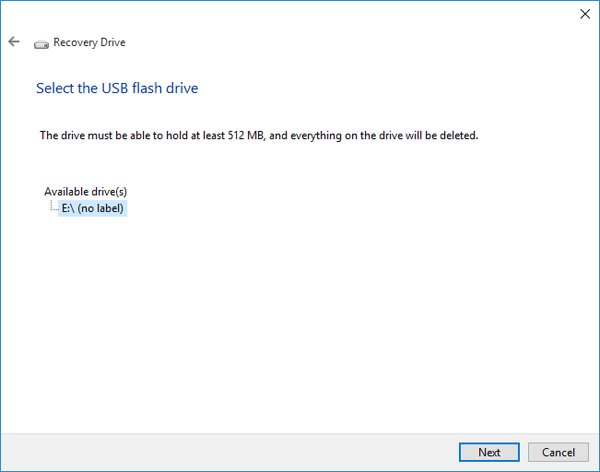
Click Next. - Windows will look for and display any accessible USB drives. Click Next after selecting the USB disc from the list.
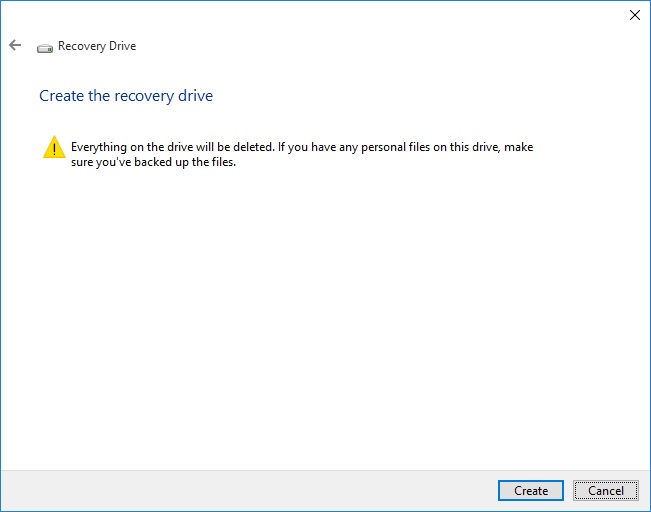
- The Recovery Drive wizard will display a warning before creating a recovery drive. Click on Create after reading the description.
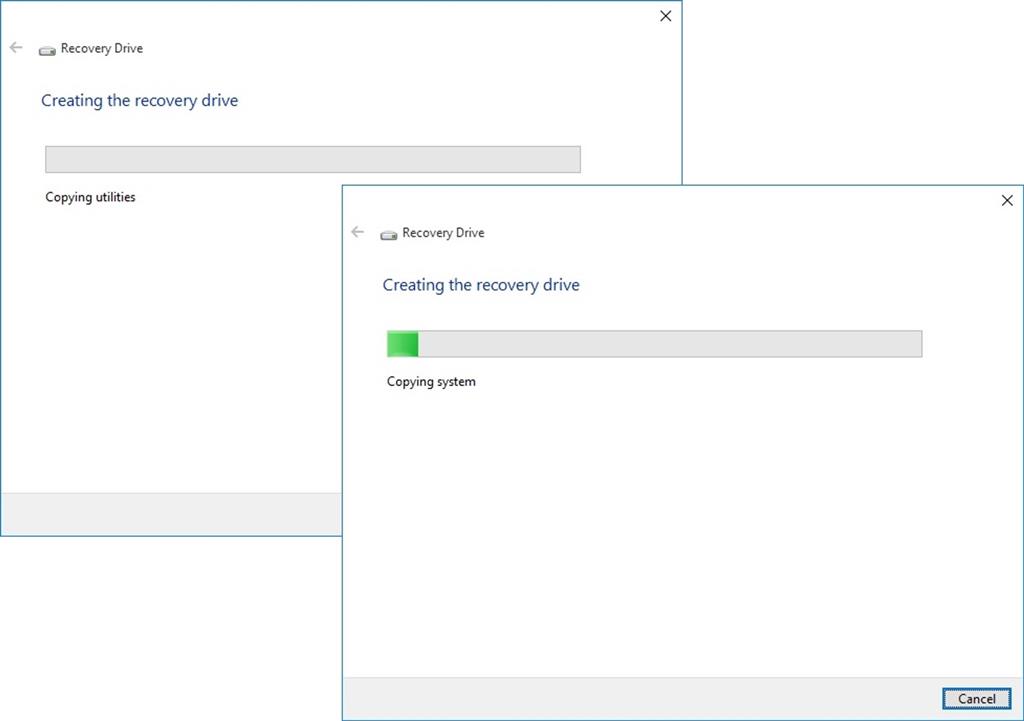
- Windows will convert your USB device to use the FAT32 file system before copying the data you need. Creating the recovery drive can take some time.
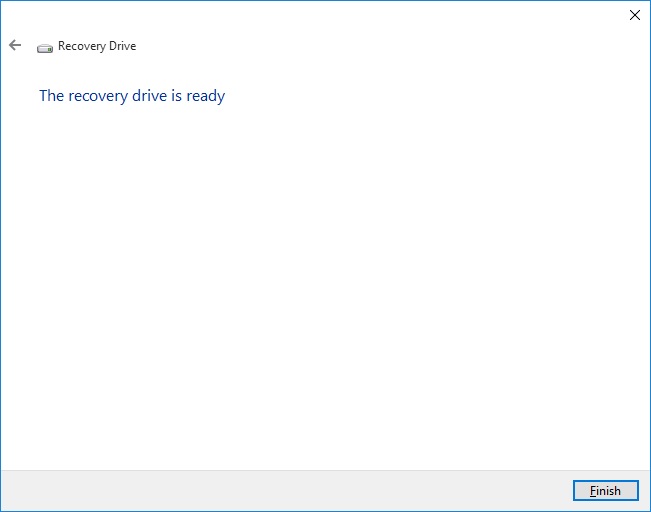
- Close the Recovery Drive window and eject the USB storage after the procedure is finished. This recovery disc can be used to fix Windows starting problems, access advanced boot settings, and refresh and reset your PC in the unlikely event of a system failure.
Click on Finish when done.

How to Create a Repair Disc
Alright, so make a system repair disc, you'll obviously need a blank DVD/CD and a DVD-RW player.
Also, It could be a piece of cake if you know how to burn a CD (Ah! the good ol' days).
Now, To create a recovery drive follow these procedures:
- Open the Control panel by searching in the menu bar or press the Windows+X key combination and select the Control panel from the menu.
- In the Control Panel window, select System and Security > Backup and Restore.
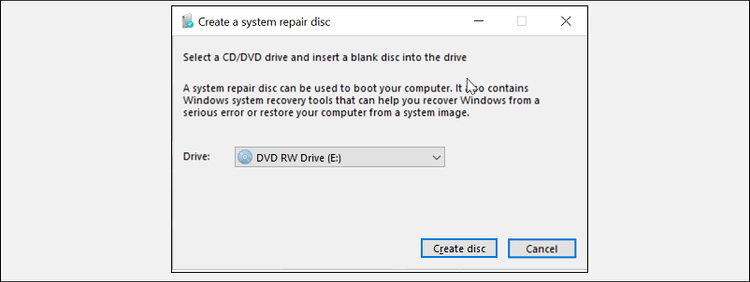
- Click the Create a system repair disc link in the left pane. Don't forget to Insert a DVD or CD into the DVD drive.
- Select your DVD/CD from the drop-down menu in the Create a system repair disc dialogue. Then, to continue, click the Create disc option.
The process of creating your system repair disc will begin in Windows. The procedure will be quick since it does not require copying system files. To understand how to utilize the disc after it has been produced, read the relevant information displayed on the screen. After that, press the Close button to eject the disc.
How to Use the System Repair Disc or Recovery Drive to Boot Windows
Simply attach the recovery disc to your computer and boot from it when you need it. Depending on the type and brand of your computer, the techniques for booting from a Flash drive may differ; see your machine manual for details on how to boot from external media. Some of them may require you to hit F2, F9, F10, ESC, F11, DEL, or a combination of keys.
Turn on your computer and insert the recovery USB drive or DVD. Your PC will immediately boot from the recovery disc and display the Troubleshoot screen. Change the boot order to boot from the recovery disc if it doesn't.
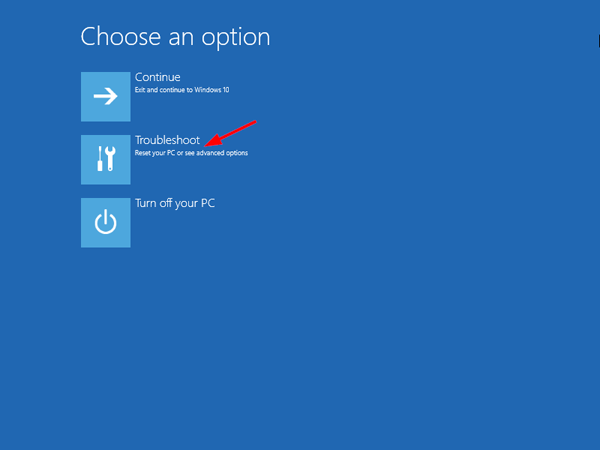 |
| Click on Troubleshoot |
You can choose to reset your computer or access Advanced settings after your PC boots from the recovery disc. Better start with the Advanced choices. In Advanced Settings, you can opt for System Restore, Recovery from System Images, Go Back to the Previous Version, and Automatic System Repair.
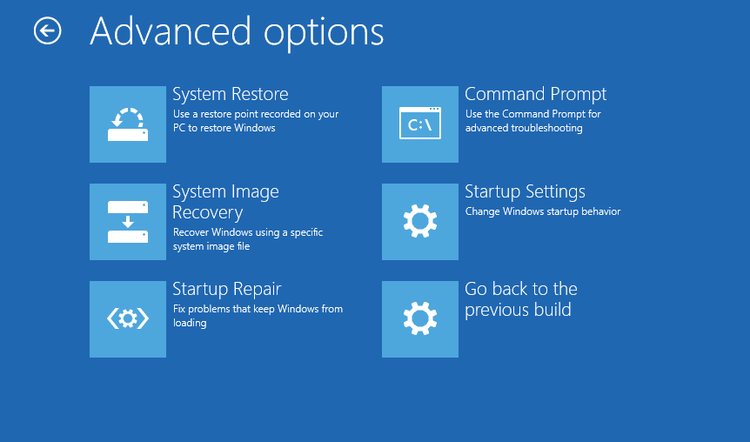
In the unlikely situation where advanced options did not work try the Reset your PC option to clean install Windows 10 as a final resort. The reset procedure will reinstall Windows, erase all data, and uninstall any programs that were not included with the operating system.
And there you go, that's how you create a System Recovery Drive and a Repair Disc on Windows. Now, you can revive your system if it runs into a dreadful crash in a matter of minutes.
Comments